
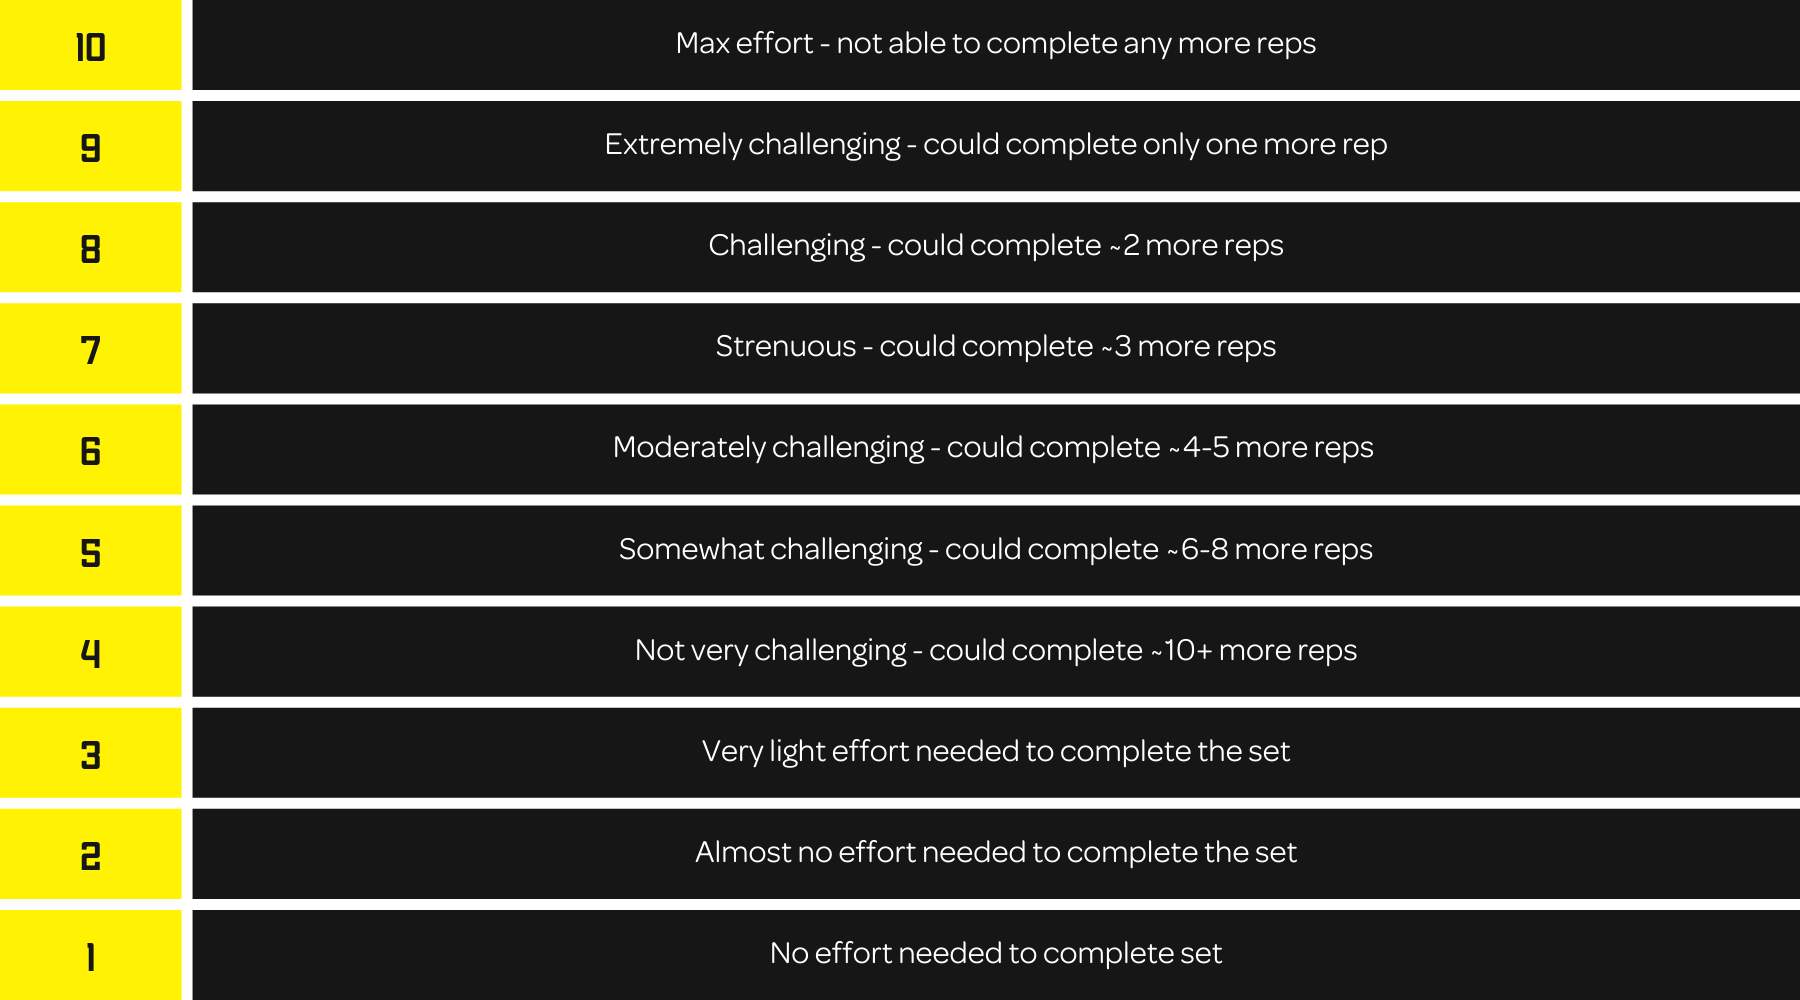
Rate of Perceived Exertion (RPE)
What is the RPE Scale?
RPE stands for “Rate of Perceived Exertion”. This scale was originally created by a Swedish researcher, Gunnar Borg. It ranged from 6-20 to loosely mimic heart rate BPM (~60 at rest up to 200). The idea is that you could use this scale to determine how strenuous an activity was. The lower the number, the easier the task, the fitter the athlete.
For instance, an experienced runner might casually do an 8min mile without much effort, whereas a recreational runner might pass out making that time.
At some point, Borg simplified the scale to be 1-10 where 1 would represent light activity and 10 represents the maximum level of effort.
How to Use RPE
Some of our intermediate and advanced workout programs use RPE to help you choose how much weight to use each set. In general, most of your training should be done in the 7-8 range. This means that your sets should be challenging, but don’t gas you out to the point you see dramatic declines in performance throughout the session.
There are times to train at RPE 9 and 10, but we advise you to do so sparingly. In some programs that means every 3rd or 4th week. If you happen to be an adrenaline junkie who loves to train near failure, save it for the end of workouts using accessories targeting smaller muscles (like shoulders, calves, and arms). You’ll be able to do this more frequently than with heavier compound movements.
It’s not a great idea to consistently train squats and deadlifts at 9s and 10s. These lifts use too much load and cause too much stress to be done at maximum intensity every session. Instead, use them to form a strong base, accumulate volume over time, and build strength strategically. Then every so often, you can really push these lifts to see where you are at. You might be surprised to find that RPE 7 and 8 are no joke when it comes to getting under the barbell!
Here’s an example of how RPE can be used for the main lift across a four-week training block into a deload:
Squats
Week 1: 4 sets of 5 reps @ RPE 6
Week 2: 4 sets of 5 reps @ RPE 7
Week 3: 4 sets of 5 reps @ RPE 8
Week 4: 4 sets of 5 reps @ RPE 9
Week 5 (Deload): 3 sets of 4 reps @ RPE 6
The advantage of using RPE over predetermined weights calculated using your one-rep max is that your max is a moving target. You might have hit a 400lb squat a few months back under perfect conditions (pre-workout, music blaring, after a breakup), but that doesn’t mean after a 12-hour shift you’re capable of the same lift. Instead, RPE allows you to hit the prescribed sets and reps at a weight that challenges you at a specific level for the session.
Benefits of RPE
It’s a straightforward and simple tool to monitor your effort when working out
It can be used for more than just lifting weights. It works for cardio and every form of training
RPE allows you to auto-regulate your training sessions to adjust for how you are feeling on the day of your workout instead of pre-determining weight weeks in advance
Cons of Using RPE
RPE can be hard to use if you’re a beginner who hasn’t ever done a workout with true max intensity. If you’ve never taken a set to failure, how do you know what your scale is?
RPE can also be tricky for high 20-30 rep sets with moderate weights (RPE 6-8). When you feel the burn it’s hard to gauge whether it’s the effort or lactic acid.
Should You Use Rate of Perceived Exertion?
RPE is a viable training tool to monitor your effort level when working out, but it will take some time to accurately use. You need an anchor for each RPE level so you know what is a 1 and what is a 10. Like anything, it takes time and practice!
Bottom line: it’s worth trying! There are several different strategies to track effort between RPE, percentage of your 1rm, RIR, etc. Try it out for a few months and see if you like it!
Your guide to better, smarter, and more effective training sessions and finally getting the results you want!
Over 50 pages covering everything you need to know about strength training, its benefits, and how you might more effectively reach your goals.
Learn to improve your endurance, build muscle, get stronger, and achieve your dream body composition
Includes actionable tips, tricks, and advice on how to warm up, select weight, use proper technique, organize your diet, and stay consistent in your workouts and healthy lifestyle.
Provides strategies on what to do inside and outside of the gym to make the most progress possible
Features an exercise swap table in case you ever need to make adjustments to your workout routine
You might have the “what”, but don’t forget about the “why”! Education is everything here at Ladies Who Lift and that’s exactly why we put together our own LWL Complete Guide to Strength Training eBook.
Our goal is to build your confidence by means of building your knowledge. We want you to walk into your training sessions knowing that your hard work is going to pay off. Learn why we lift, how to train for your goals, what makes a successful workout program, and more in this info-packed guide!
Whether you’re training with us or following your own program, this manual is worth a read.
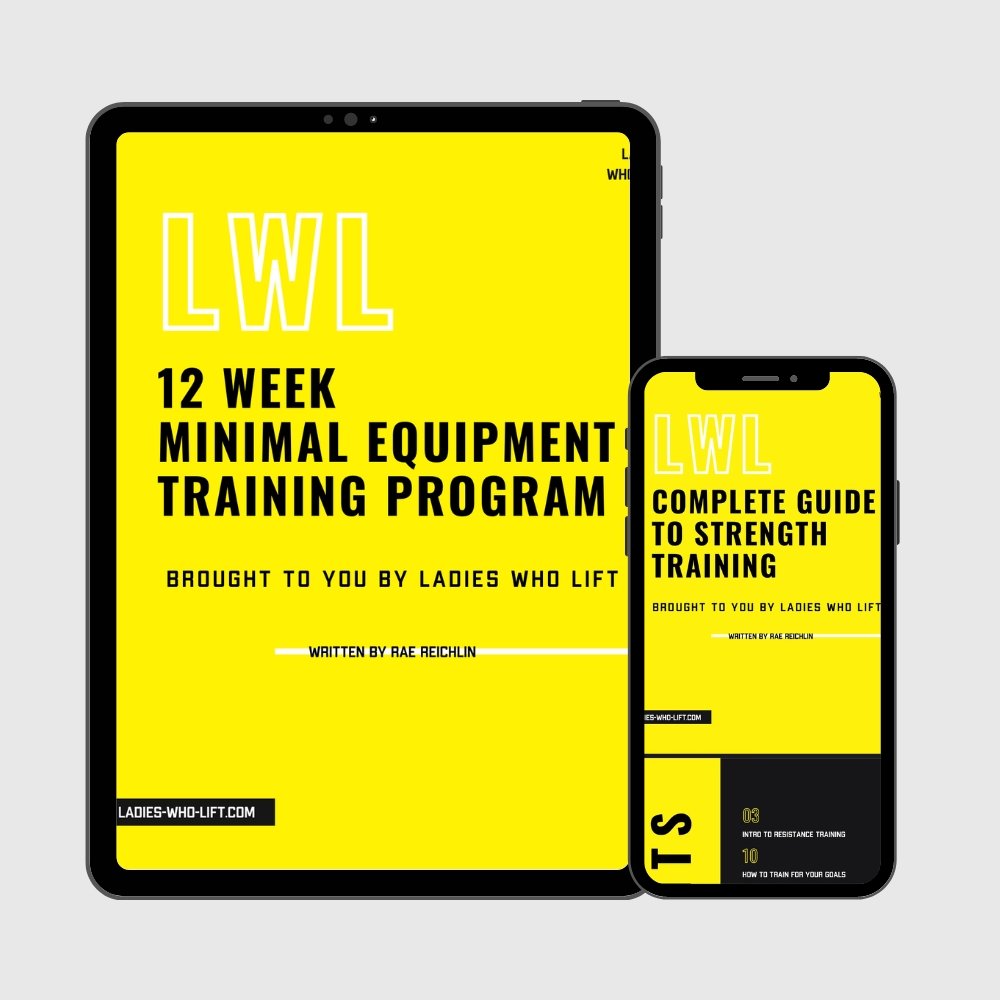
A twelve-week minimal equipment program that will improve your endurance, build muscle, gain strength, and help you achieve your dream body composition
Provides the exact exercises with video demonstrations, sets, reps, tempo, weight, and rest times for every workout
The 70+ page PDF includes jump links so you can easily navigate through the program on your phone or desktop
Appropriate for all fitness levels who have minimal gym equipment (resistance bands and dumbbells)
Weeks 1-4: Endurance block. Train 4 days a week with 4 total body days
Weeks 5-8: Hypertrophy block. Train 4 days a week with 2 upper body and 2 lower body workouts
Weeks 9-12: Max strength block. Train 4 days a week with 2 upper body and 2 lower body workouts
Includes our downloadable LWL Complete Guide to Strength Training which has over 50 pages covering resistance training benefits, how to achieve your fitness and physique goals, how to guarantee a program’s success, staying flexible with your program, technique tips, and fitness terminology.
You no longer need to be a member to work out with Ladies Who Lift! If you aren’t quite ready for personalized coaching, but still want serious results, our twelve-week program is perfect for you.
We include three 4 week training phases to help you improve your endurance, muscle growth, and strength. Our easy-to-follow PDF provides every detail needed to follow a well-rounded strength program.
And better yet, we have also included our LWL Complete Guide to Strength Training Ebook so you can get both the “what” and the “why”!

A twelve-week gym-based program that will improve your endurance, build muscle, gain strength, and help you change your body composition
Provides the exact exercises with video demonstrations, sets, reps, tempo, weight, and rest times for every workout
The 70+ page PDF includes jump links so you can easily navigate through the program on your phone or desktop
Appropriate for all fitness levels with access to standard gym equipment such as barbells, dumbbells, cable machines, and basic machines.
Weeks 1-4: Endurance block. Train 4 days a week with 4 total body days
Weeks 5-8: Hypertrophy block. Train 4 days a week with 2 upper body and 2 lower body workouts
Weeks 9-12: Max strength block. Train 4 days a week with 2 upper body and 2 lower body workouts
Includes our downloadable LWL Complete Guide to Strength Training which has over 50 pages covering resistance training benefits, how to achieve your fitness and physique goals, how to guarantee a program’s success, staying flexible with your program, technique tips, and fitness terminology.
You no longer need to be a member to work out with Ladies Who Lift! If you aren’t quite ready for personalized coaching, but still want serious results, our twelve-week program is perfect for you.
We include three 4 week training phases to help you improve your endurance, muscle growth, and strength. Our easy-to-follow PDF provides every detail needed to follow a well-rounded strength program.
And better yet, we have also included our LWL Complete Guide to Strength Training so you can get both the “what” and the “why”!